Introduction
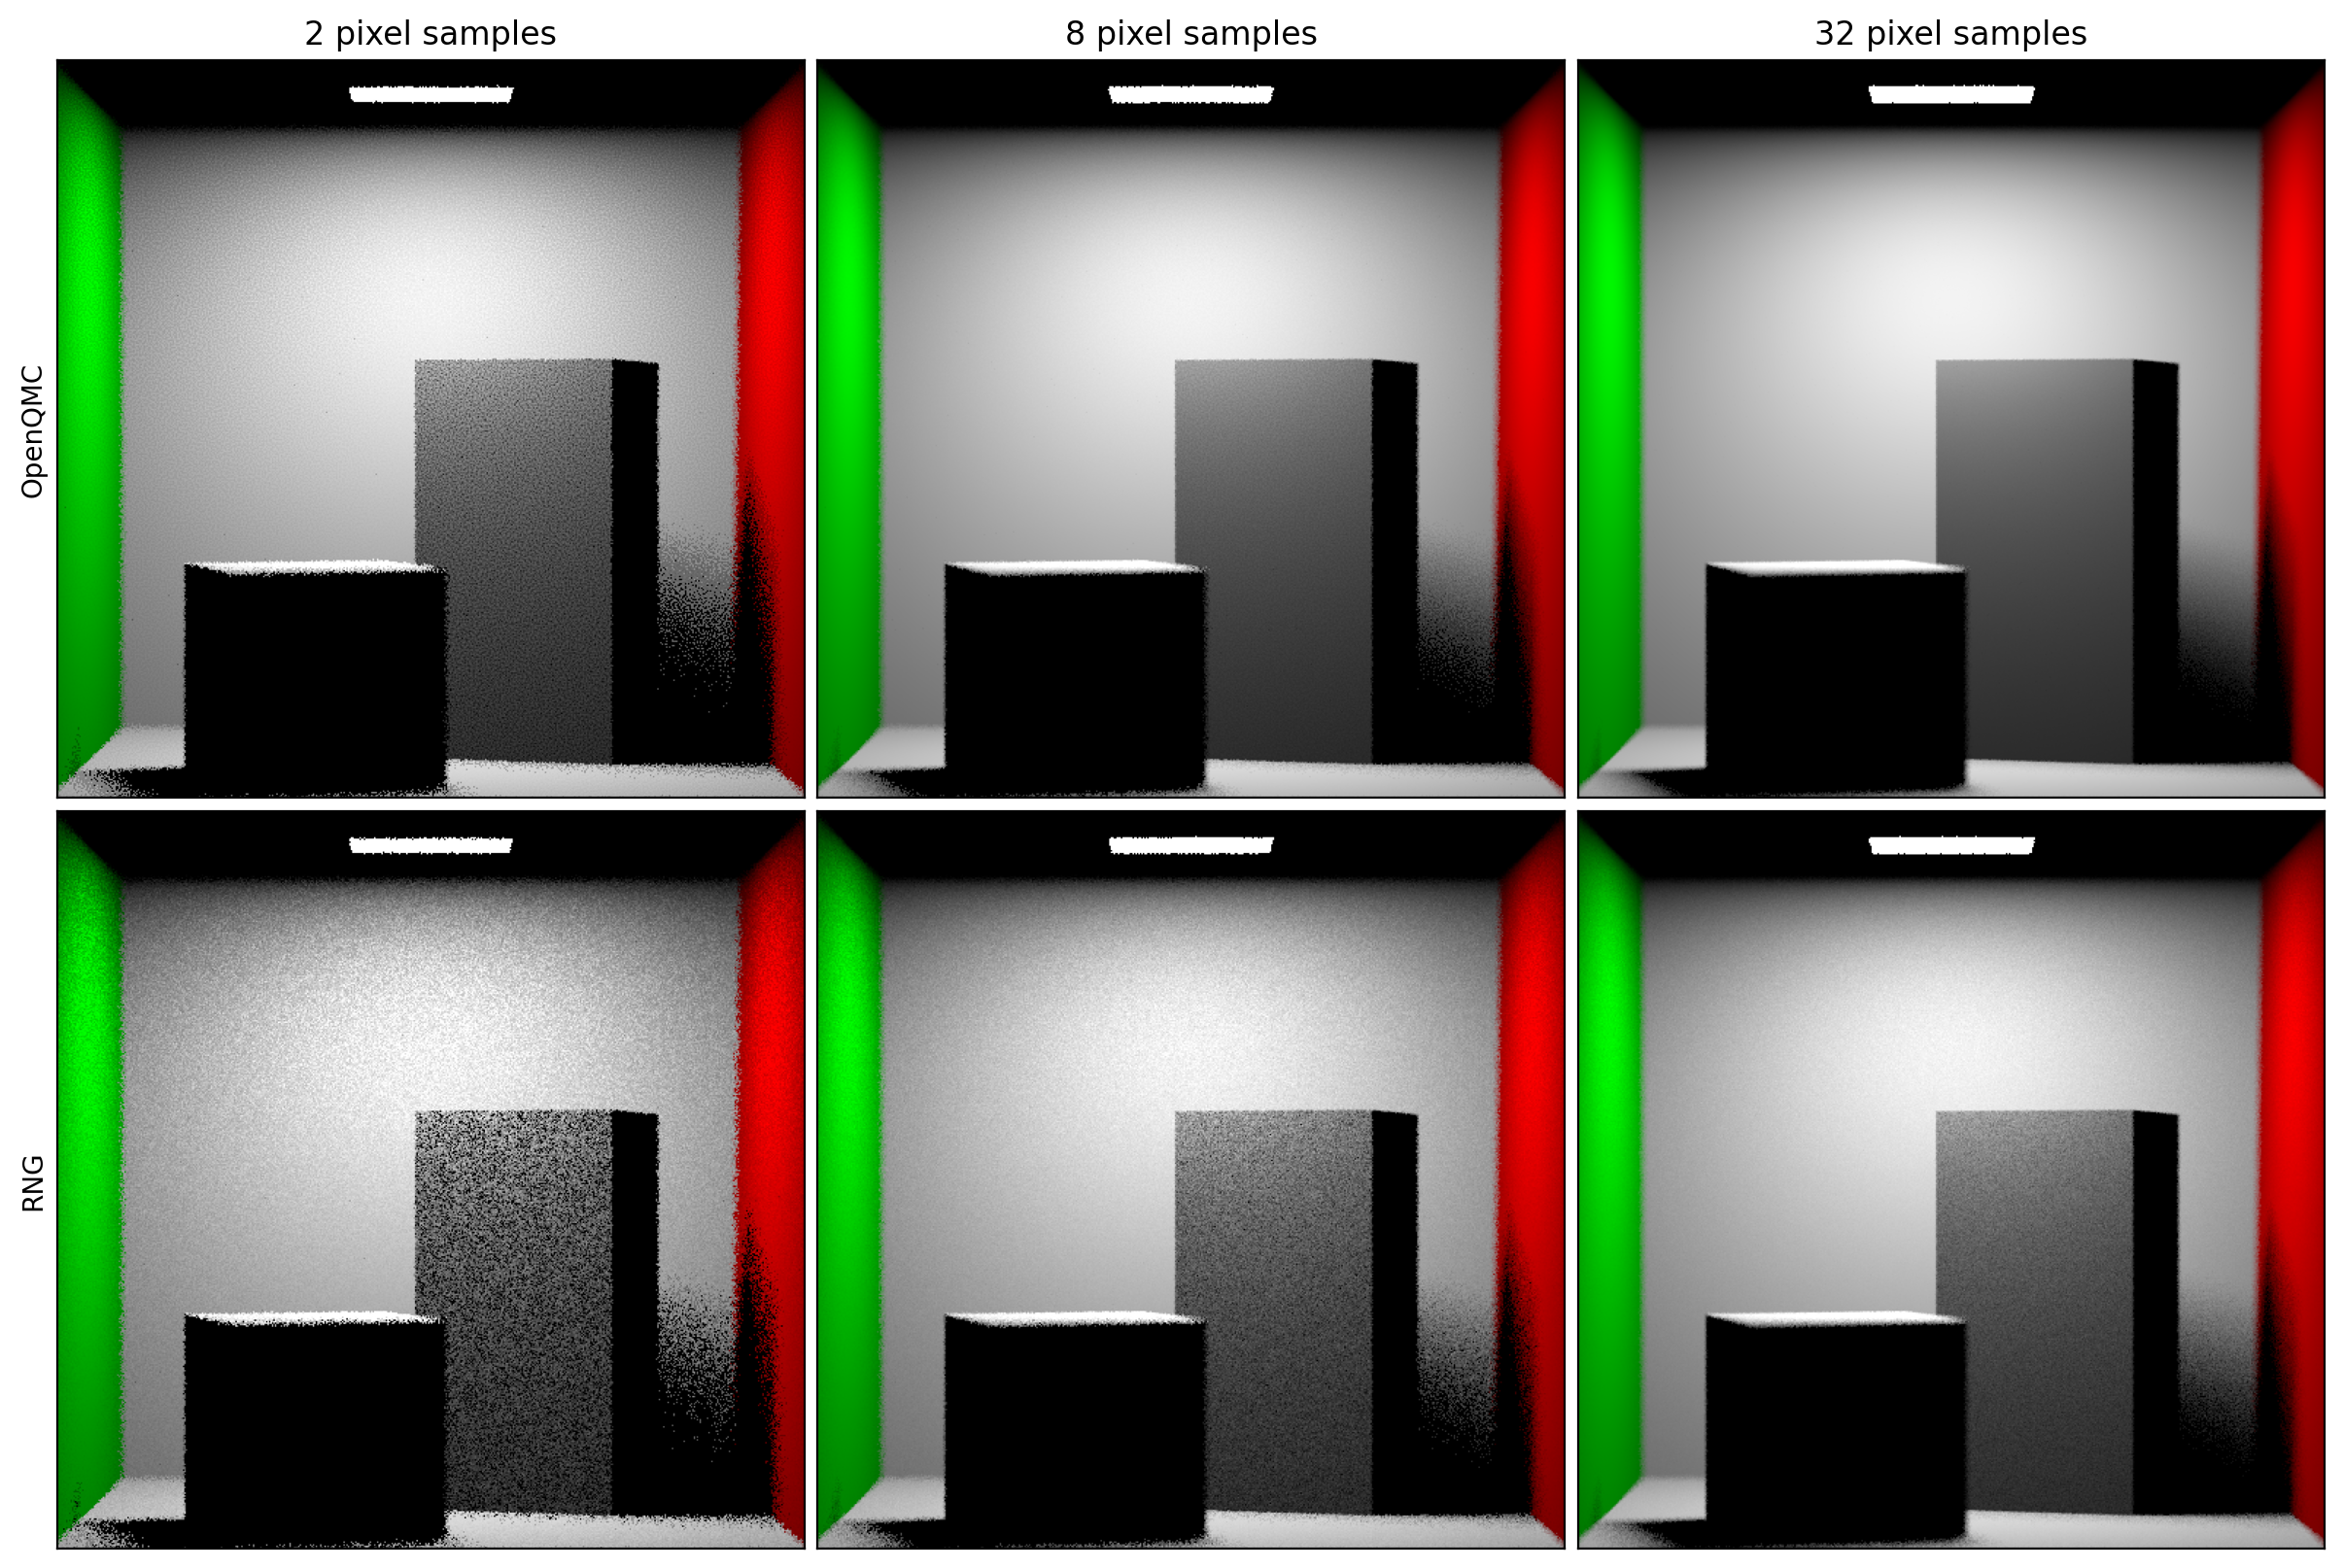
OpenQMC is a library for sampling high quality Quasi-Monte Carlo (QMC) points and generating pseudo random numbers. Designed for graphics applications, the library is part of Framestore's proprietary renderer Freak and is actively used in VFX production.
Description
This C++14 (CPU, GPU) header only library provides an API to deliver high quality QMC sample points. The API aims to be compatible with a variety of common use cases found in production codebases. The library also provides multiple state of the art back-end implementations to minimise noise.
There are three primary aims for the project:
- Standardise a flexible sampler API.
- Deliver performant implementations.
- Provide high quality results.
The project doesn't aim to:
- Implement an exhaustive list of sequences.
- Provide educational implementations.
Project features are:
- Supports different architectures (CPU, GPU, etc).
- Static interface / zero cost abstraction.
- Solutions for different sampling use cases.
- Supports progressive / adaptive pixel sampling.
- Suitable for depth and wavefront rendering.
- Includes spatial blue noise dithering.
- Clear and extendable code base.
- Unit and statistical testing.
- Modern CMake based build system.
- Header only and binary configurations.
- No library or STL dependencies.
- Includes tools, docs and examples.
The API lets you focus on writing graphics algorithms while getting bias-free results and best-in-class convergence rates. The project maintainers would like developers to leverage QMC sampling everywhere confidently — this is what the OpenQMC API and the concept of domain branching aim to achieve.
The project is battle-tested. Framestore actively uses a variant of this library to produce visually rich feature film VFX content and is committed to continue contributing any further improvements to this open initiative.
Usage
Here is a quick example of what OpenQMC looks like. Feel free to copy and paste this code to get yourself started, or continue reading to learn about other samplers, the API, and techniques for writing more advanced algorithms.
// 1. Include the sampler implementation.
#include <oqmc/pmjbn.h>

// 2. Initialise the sampler cache.
auto cache = new char[oqmc::PmjBnSampler::cacheSize];
oqmc::PmjBnSampler::initialiseCache(cache);

// 3. Loop over all pixels in the image.
for(int x = 0; x < resolution; ++x)
{
    for(int y = 0; y < resolution; ++y)
    {
        // 4. Loop over all the sample indices.
        for(int index = 0; index < nSamples; ++index)
        {
            // 5. Create a sampler object for the pixel domain.
            const auto domain = oqmc::PmjBnSampler(x, y, 0, index, cache);

            // 6. Draw a sample point from the domain.
            float sample[2];
            domain.drawSample<2>(sample);

            // 7. Offset the point into the pixel.
            const auto xOffset = x + sample[0];
            const auto yOffset = y + sample[1];

            // 8. Add value to the pixel if within disk.
            if(xOffset * xOffset + yOffset * yOffset < resolution * resolution)
            {
                image[x * resolution + y] += 1.0f / nSamples;
            }
        }
    }
}

// 9. Deallocate the sampler cache.
delete[] cache;
This algorithm loops over all pixels and for each sample adds a small value if a random pixel offset falls within a quarter disk. The end result is an image of a disk with anti-aliased pixels across the edge of the shape.
If you would like to see a real example of a path tracer, have a look at the source code for the trace tool. Or alternatively go to the concepts and examples section to read about more advanced solutions.